🎛️ Configuring a Training Job
This guide explains every field on the Train Model panel to help you understand and configure your model training setup.
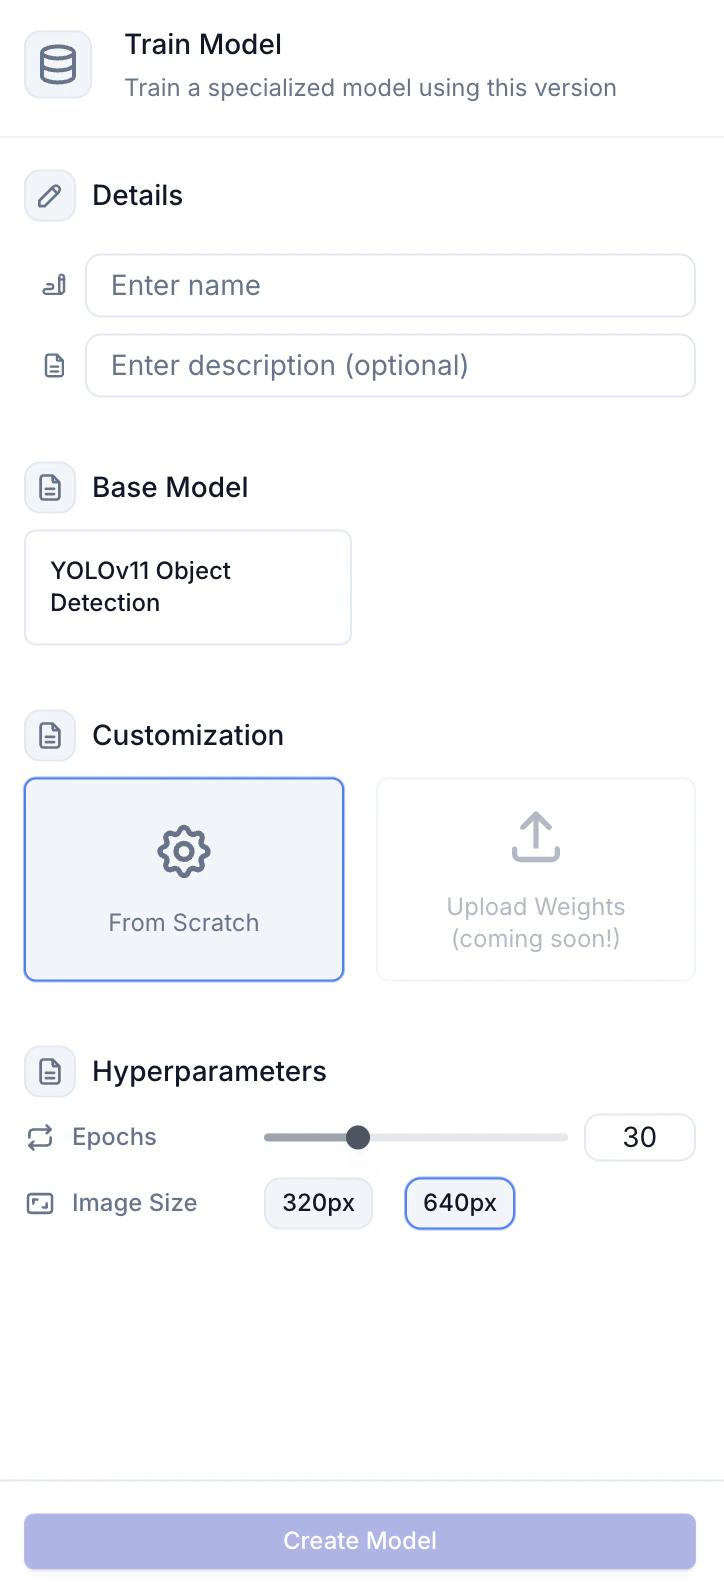
1. Details
| Field | Purpose | Example |
|---|
| Name | Identifies the run in history | Hand_Detector_v1_10Ep |
| Description | (optional) Notes for future you | Testing larger image size |
2. Base Model
You can currently choose between two base models depending on the project type:
- YOLOv11 Object Detection – used with bounding boxes annotations
- YOLOv11 Segmentation – used with polygon and SAM-2 generated annotations
Depending on the current project’s type (object detection or segmentation), you will only see the one available model for that project type.
Both models the latest generation from Ultralytics, fusing an upgraded backbone
and neck for higher accuracy with fewer parameters [Ultralytics Docs].
3. Model Variant
Choosing a variant is a trade-off between speed & accuracy.
| Variant | Params (M) | COCO mAP50-95² | Notes |
|---|
n | 2.6 | 39.5 | Ultra-light, mobile & IoT |
s | 9.4 | 47.0 | Good for edge GPUs |
m | 20.1 | 51.5 | Balanced; default |
l | 26.2 | 54.0 | Higher accuracy, more VRAM |
x | 58.8 | 56.8 | Maximum accuracy, slowest |
m is an excellent starting point for most users.
4. Customization
| Option | When to use |
|---|
| From Scratch | Fresh dataset or new architecture. |
| Upload Weights (coming soon) | Resume / fine-tune a previous model. |
5. Hyper-parameters
| Parameter | UI Control | Range | What it does |
|---|
| Epochs | Slider | 1-100 | Number of full passes through the training set. |
| Image Size | Radio-buttons (320 / 640) | 320 or 640 px | Resolution the model is trained with. Higher helps small objects but needs more VRAM. |
Other YOLO hyper-parameters (batch size, learning rate, momentum, etc.) are
managed automatically by the trainer and use Ultralytics’ recommended
defaults.
6. Launch the Job
Hit Create Model. Your run queues and begins on our GPU fleet. You will be redirected to the models tab, where performance
metrics and graphs will be available after the training run is complete.
Prefer code? Head to Notebooks for SDK-based examples.