> ## Documentation Index
> Fetch the complete documentation index at: https://docs.useocular.com/llms.txt
> Use this file to discover all available pages before exploring further.
# Making Annotations
> Create and edit annotations using Canvas tools
### Making an Annotation
Once you open the canvas, navigate to the toolbar on the right side and select a tool (bounding box, polygon, or smart polygon (SAM2)). You can also select the "grab" tool at any time to reposition the image or drag existing annotations.
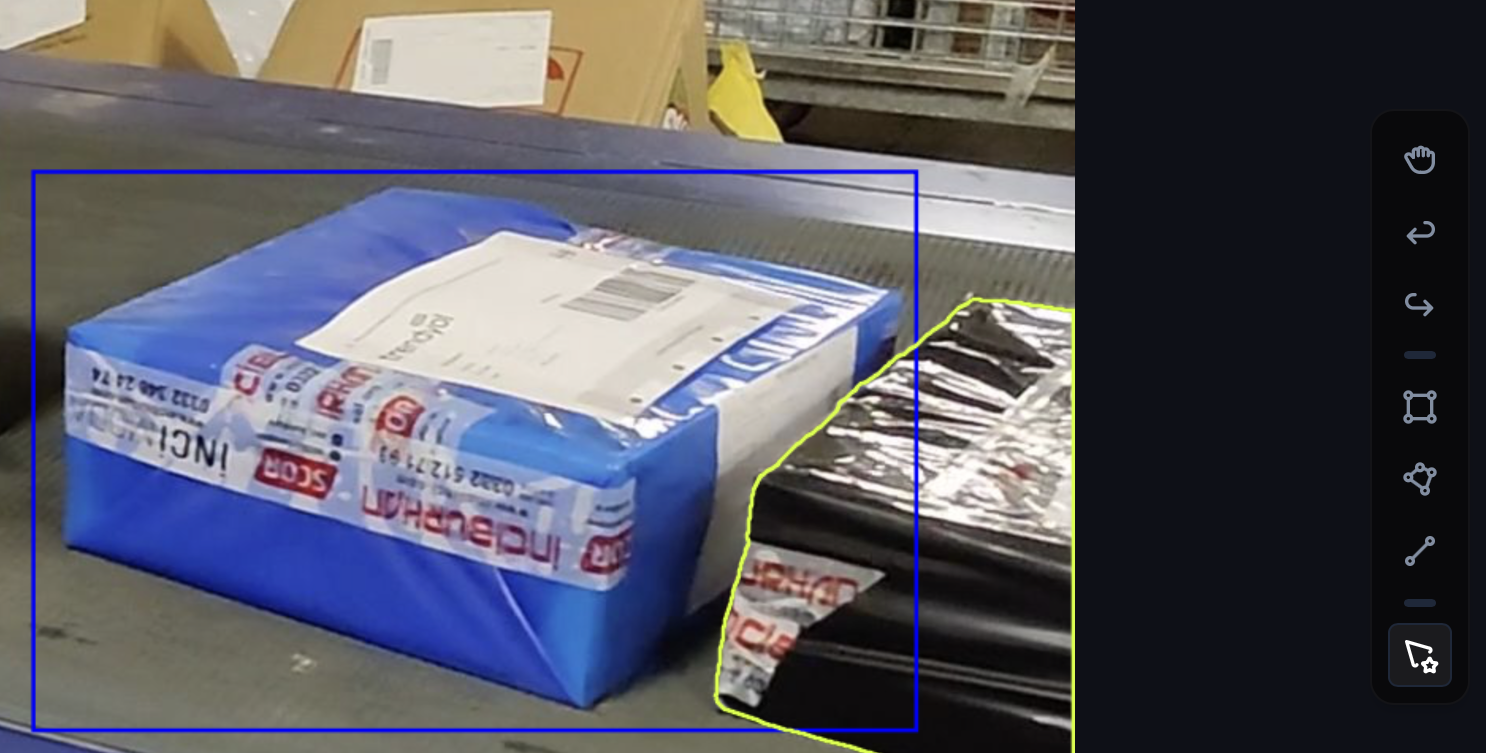
Click and drag to create a bounding box or polygon on the current image (if using the SAM2 tool (smart polygon), bounding box will automatically snap to the contours of the object after you release).
Once the outline is created, you will see a popup prompting you to select a label for that annoation. Select a label and hit save, and the annotation will be saved and show up in the left sidebar.
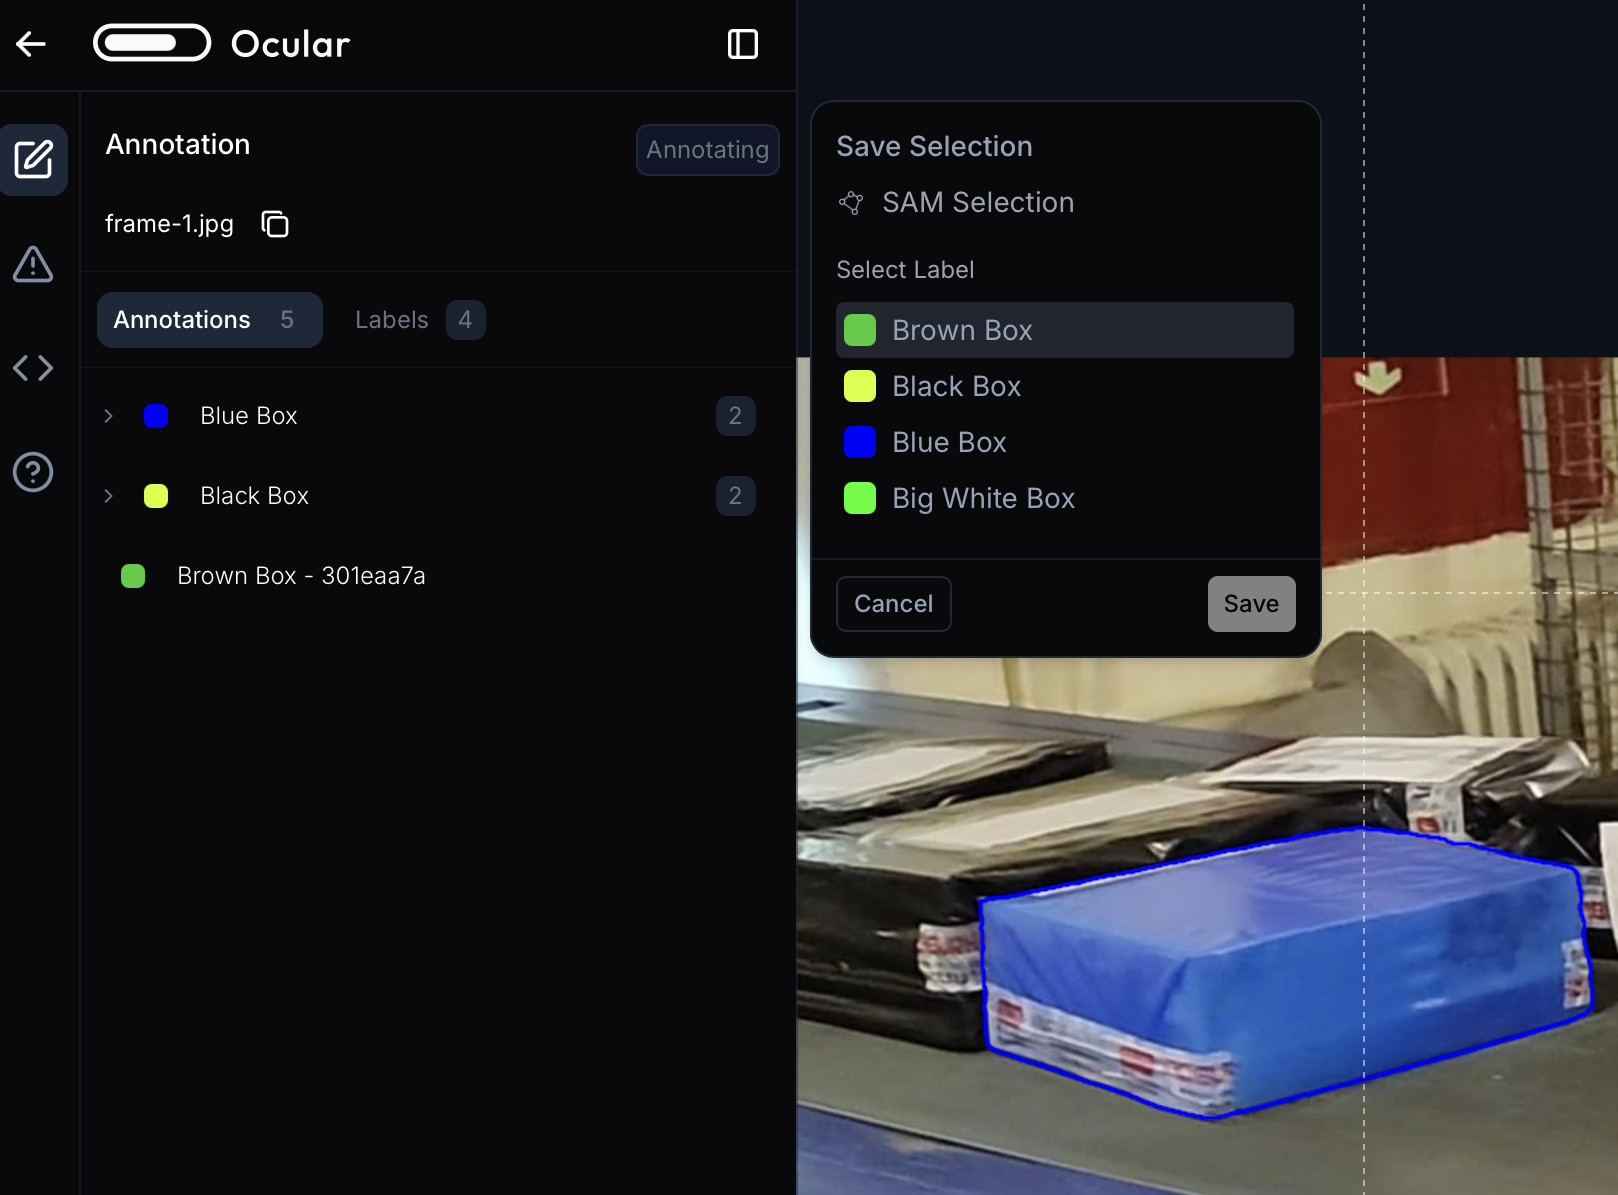 If you want to edit the chosen label, simply click on the annotation again and the popup will reappear.